***I am a Pampered Chef Consultant – please contact me by clicking any of the buttons above when you would like to schedule your virtual or in-person party, fundraiser or wedding shower, or to place an order. If you have any questions about the products you already have, or want some information on starting your own PC business, I can help you with that as well!!***
Recipes may have been adapted, either using a different cooking method and/or pantry seasonings from the Pampered Chef. Appropriate credit has been given to the recipe blogger I have found it from, along with links back to the original source. Let’s get cooking!
Subscribe below to get emails whenever I share new recipes and tutorials!
Deliciously satisfying! These easy French Onion Chicken Meatballs are juicy, cheesy, and perfect for a quick weeknight dinner. I adapted this recipe from Delish, but changed how I cook the onions a bit, as I have found my method creates the richest, most flavorful onions ever! I also decided to use my Deluxe Air Fryer for the meatballs, but you could also bake or – even better – grill them.
For this recipe I used my favorite meatball maker, the Large Scoop, the Rapid-Prep Mandoline for the onions, and, of course, my Deluxe Air Fryer:

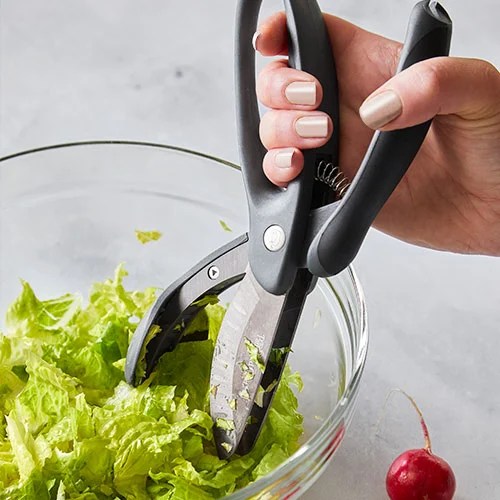
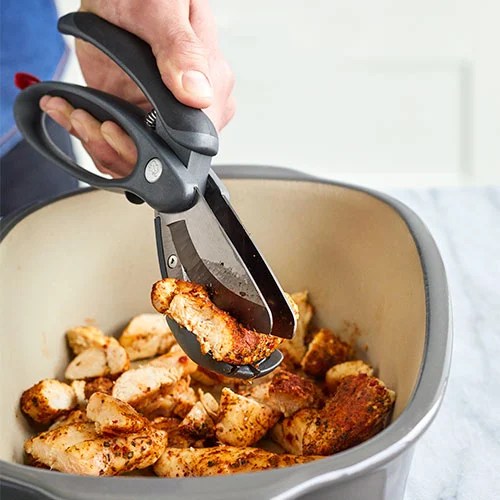
Get the scoop! This heavy-duty stainless-steel scoop is great for evenly portioning batters, doughs, fillings, and salads. Squeeze-action handles allow for convenient one-handed use. Approximately 3 tbsp. Dishwasher-safe.

UPRIGHT MANDOLINE
Our Rapid-Prep Mandoline lets you safely slice, dice, julienne, and french-fry cut fruits and veggies in seconds. Simply select your cut, adjust its thickness from 8 thickness settings, and get prepping. Our mandoline’s stainless-steel blade cuts through tough veggies, so you can transform a variety of ingredients into beautiful slices.
And, you can cut ingredients with confidence—our mandoline is designed to safely keep hands clear of blades. When you’ve finished prepping, you can store the food chute and food pusher in the food catch tray and fold it flat, though you’ll use it so often, you may want to leave it on your counter!
Key Features
- Designed to safely keep hand clear of the blades
- Slice, French Fry cut, and Juliene cut with 8 thickness settings
Product Details
- 5-piece set: Mandoline, food catch tray, food chute, food pusher, and Dual-Sided Cleaning Brush.
- Stainless-steel blade
- Folds for easy storage
- Dishwasher-safe

Best Air Fryer for a Family
Enjoy fried foods at home without all the mess, hassle, and oil of deep frying but with all the flavor and texture you love. Ours is family-sized to quickly cook up to six servings, a whole chicken or roast, or appetizers for a crowd. Like a convection oven, superheated air circulates giving food a crispy texture. No preheating is necessary, saving you precious time. Conveniently fits under kitchen cabinets.
Air Fryer, Rotisserie, & Dehydrator All-in-One
Ours does more than just better-for-you air frying. It makes perfectly cooked rotisserie chicken, crispy outside and tender inside, so you can skip the hit-or-miss ones at the grocery store. And it dehydrates fruits, veggies, and herbs so you can enjoy their fresh flavors well beyond the season.
Product Details
- Family-sized 11.6-qt. capacity fits up to a 4 lb. whole chicken.
- Eight programmed settings: Air Fry, Bake, Roast, Rotisserie, Reheat, Dehydrate, Custom, and Rotate
- Includes two cooking trays, basket, rotisserie set, drip tray, retrieval tool, removable shield, and a cooking guide.
- 14½” tall x 12 3/4″ x 14 1/4″
Click the links to get your Large Scoop, Rapid-Prep Mandoline and Deluxe Air Fryer today. You’ll be glad you did.
Let’s jump right in!
Ingredients
For the meatballs
- 1 lb. ground chicken
- 1/2 cup shredded Gruyère
- 1/4 cup breadcrumbs
- 2 tablespoons flat parsley freshly chopped
- 1 large egg, beaten
- 2 cloves garlic, sliced
- 1 teaspoon kosher salt
- Freshly ground black pepper
For the French Onion Sauce
- 4 tablespoons butter
- 2 large onions sliced 1/4″/6 mm thick
- 2 teaspoons freshly chopped thyme
- ½ teaspoon kosher salt
- Freshly ground black pepper
- 2 ½ cups beef broth divided
- 2 teaspoons freshly chopped thyme, plus more for garnish
- Kosher salt
- Freshly ground black pepper
- 1 1/2 cups shredded Gruyère
Instructions
For the Meatballs
In a large bowl, combine ground chicken, Gruyère, breadcrumbs, parsley, egg, and garlic. Season with salt and pepper. Use the Large Scoop to form into 16 meatballs (@ 3 tbsp. each), then place on racks in the Deluxe Air Fryer and set to Air Fry for 25 minutes, switching trays halfway through, until golden and cooked through.


For the French Onion Sauce
While the meatballs are cooking, make the sauce.
Use the Rapid-Prep Mandoline to slice the onions. In a large skillet over medium heat, melt butter. Add onions, thyme and salt, stir to combine. Cover for five minutes.


Remove lid and let onions caramelize until golden brown and jammy over medium heat, stirring occasionally and adding in the ½ cup of beef broth a little at a time every 5-10 minutes, cooking for approximately 25 minutes.


Add in garlic, cooking for one minute, or until fragrant. Add broth and season with salt and pepper. Bring to a boil, then reduce heat and let simmer until slightly thickened, 10 minutes.


Add meatballs to skillet and sprinkle with Gruyère. Cover and cook until meatballs are warmed through, and cheese is melty, 5 minutes. Serve warm, garnished with thyme.


That’s a wrap! I’d love to hear your thoughts, so please leave a comment below. Your feedback means a lot to me! Together, we’re making kitchen life easier, one Pampered Chef tool at a time.
Happy cooking!
— imapampchef
***I am a Pampered Chef Consultant – please contact me when you would like to schedule your virtual or in-person party, fundraiser or wedding shower, or to place an order. If you have any questions about the products you already have, or want some information on starting your own PC business, I can help you with that as well!!***
Here’s the scoop on all our March 2026 Host and Guest specials!!
APRIL – New Spring Finds – Shop our newest and coolest kitchen tools!
Made to Last. Meant to Love. Save on our best sellers!

For HOSTS – Get 60% off any product or set—including new products! See details.

Hosting a party is the perfect way to treat yourself to must-have kitchen tools, and find gift-worthy sets for upcoming celebrations! 👉 Ready to plan your in-home or virtual party? Click here to get started:
👇
🎁GUESTS GIFT WITH PURCHASE 🎁
- Spend $90 – Get a $15 account credit on your next order!*
- PLUS – FREE STANDARD SHIPPING with any $150 purchase. Offer ends April 30th. See details.
🎉 Don’t wait—these deals won’t last! 🎉

I’d love to hear from you! Please drop a comment below or send me a direct message to place an order or schedule your in-home, virtual, or catalog party with me. I’m excited to help you earn some fantastic FREE and discounted products!

Imapampchef
Subscribe below to get emails whenever I share new recipes!
Follow me on Facebook – Instagram – Tik Tok – Pinterest – YouTube

French Onion Chicken Meatballs (Video)
Equipment


Ingredients
Ingredients
For the Meatballs
- 1 lb. ground chicken
- ½ cup Gruyère shredded
- ¼ cup breadcrumbs
- 2 tablespoons flat parsley freshly chopped
- 1 large egg beaten
- 2 cloves garlic sliced or chopped
- 1 teaspoon kosher salt
- Freshly ground black pepper
For the French Onion Sauce
- 4 tablespoons butter
- 2 large onions sliced 1/4"/6 mm thick
- 2 teaspoons thyme freshly chopped, plus more for garnish
- ½ teaspoon kosher salt
- 2 cloves garlic sliced or chopped
- 2 ½ cups beef broth divided
- Kosher salt
- Freshly ground black pepper
- 1 ½ cups Gruyère shredded
Instructions
Instructions
For the Meatballs
- In a large bowl, combine ground chicken, Gruyère, breadcrumbs, parsley, egg, and garlic. Season with salt and pepper. Use the Large Scoop to form into 16 meatballs, approximately 3 tablespoons per meatball. Place meatballs on racks in the Deluxe Air Fryer and set to Air Fry for 25 minutes, switching trays halfway through, until golden and cooked through.1 lb. ground chicken, 1/2 cup Gruyère, 1/4 cup breadcrumbs, 2 tablespoons flat parsley , 1 large egg, 2 cloves garlic, 1 teaspoon kosher salt, Freshly ground black pepper
For the French Onion Sauce
- While the meatballs are cooking, make the sauce.
- Use the Rapid-Prep Mandoline to slice the onions. In a large skillet over medium heat, melt butter. Add onions, thyme and salt, stir to combine. Cover for five minutes.4 tablespoons butter, 2 large onions, ½ teaspoon kosher salt, 2 teaspoons thyme
- Remove lid and let onions caramelize until golden brown and jammy over medium heat, stirring occasionally and adding in the ½ cup of beef broth a little at a time every 5-10 minutes, cooking for approximately 25 minutes.2 ½ cups beef broth
- Add in garlic, cooking for one minute, or until fragrant. Add broth and season with salt and pepper. Bring to a boil, then reduce heat and let simmer until slightly thickened, 10 minutes.2 cloves garlic, 2 ½ cups beef broth , Kosher salt, Freshly ground black pepper
- Add meatballs to skillet and sprinkle with Gruyère. Cover and cook until meatballs are warmed through, and cheese is melty, 5 minutes. Serve warm, garnished with thyme.1 1/2 cups Gruyère
Notes
To freeze after cooking, place in an airtight container without any sauce and freeze up to three months,
Nutrition Estimate
Nutritional Information Disclaimer:
The provided nutritional information is automatically calculated and should only be used as an approximation. It is offered as a courtesy and may not reflect exact values due to variations in ingredients, cooking methods, and other factors. We recommend consulting with a qualified healthcare professional or nutritionist for precise dietary information.